
How to edit a screenshot on Mac
Your Mac comes with a simple screenshot editor called Markup. It's fine for a quick arrow or a crop. For highlighting text, numbering steps or hiding private details, a dedicated editor is quicker. This guide covers both.
The short version: for a quick edit, take a screenshot with ⌘⇧4 and click the thumbnail that appears in the corner. For more tools, press ⌘⌃⇧4 to copy the screenshot, open Shotlighter and press ⌘V.
On Windows? See how to edit a screenshot on Windows.
Edit with Markup, the built-in editor
- Take a screenshot with ⌘⇧4 (Command-Shift-4) and drag over the area you want.
- Click the thumbnail in the bottom-right corner of the screen before it slides away. The screenshot opens in a Markup window.
- Use the toolbar at the top. The pen tools draw freehand, the Shapes menu has arrows, boxes, circles and a magnifier, and the text tool adds labels.
- Click Done to save the edited screenshot.
If the thumbnail has already gone, double-click the screenshot file to open it in Preview, then press ⌘⇧A to show the Markup toolbar. To crop in Preview, drag over the area you want to keep and press ⌘K. Preview can also open a screenshot you copied: choose File > New from Clipboard.
No thumbnail at all? Press ⌘⇧5, click Options, and make sure Show Floating Thumbnail is ticked.
What Markup can't do
- Blur or pixelate. You can cover something with a filled shape, but not blur it.
- Highlight text neatly. A freehand stroke rarely sits straight on a line of text.
- Number steps for you. Each number is a separate text box that you type and place.
- Add a backdrop. There's no way to set the screenshot on a background with a shadow for docs and slides.
Edit in Shotlighter
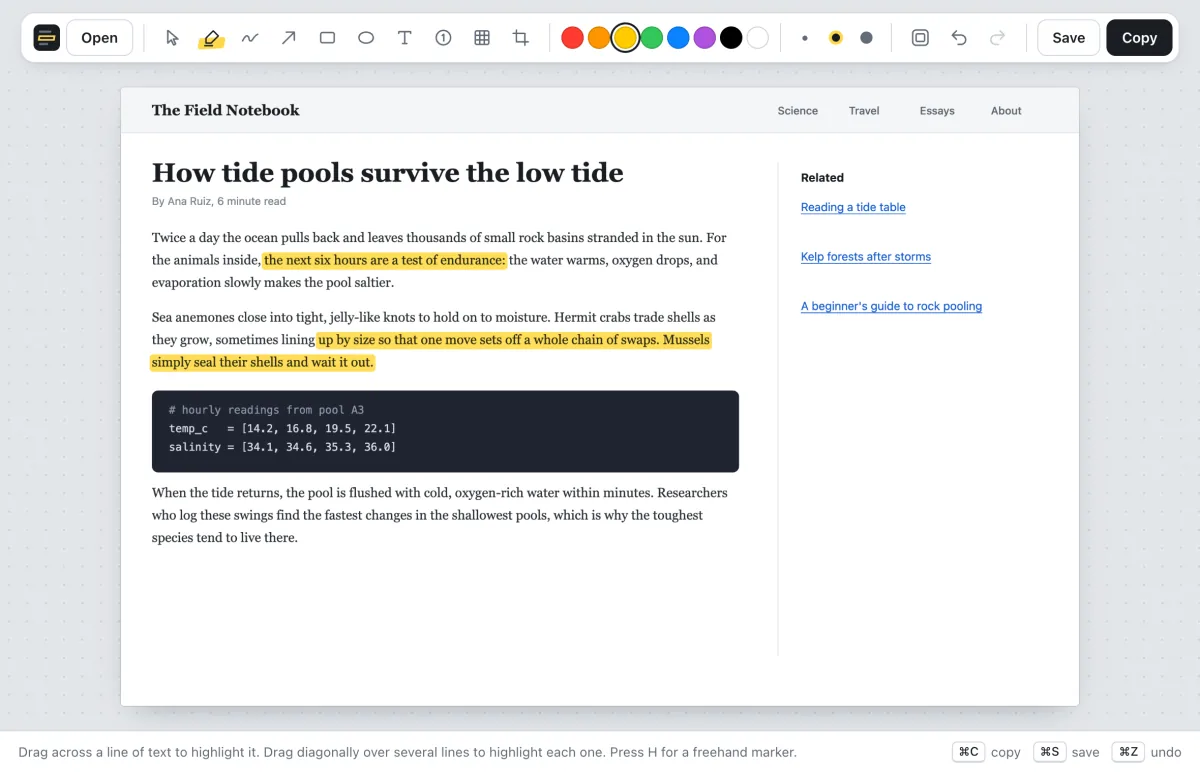
Shotlighter is a free screenshot editor that runs in your browser. It works from the clipboard, so screenshots don't pile up on your desktop, and your images are never uploaded.
- Press ⌘⌃⇧4 (Command-Control-Shift-4) and drag over the area. Holding Control copies the screenshot to the clipboard instead of saving a file.
- Open Shotlighter and press ⌘V. You can also drag the floating thumbnail or a screenshot file onto the page.
- Edit with the toolbar, or with the one-key shortcuts below.
- Press ⌘C to copy the result and paste it into Slack, Mail or a doc, or ⌘S to save a PNG.
| Key | What it does |
|---|---|
| H | Highlighter. Drag across text and it snaps to the line and to whole words. See how to highlight text. |
| A, R, E, T | Arrow, box, ellipse and text. See how to add arrows, boxes and text. |
| N | Numbered marker. Counts up with each click. See step-by-step screenshots. |
| D | Redact. Pixelates an area; press D again for solid blocks. See how to blur a screenshot. |
| C, B | Crop and backdrop. Trim to what matters, then set it on a gradient with a shadow. See how to crop and add a backdrop. |
| ⌘Z | Undo, as far back as you need. |
Markup or Shotlighter?
| Markup | Shotlighter | |
|---|---|---|
| Arrows, boxes and text | Yes | Yes |
| Crop | Yes | Yes |
| Highlight a sentence | Freehand or a box | Snaps to the line and to whole words |
| Hide private details | Cover with a filled shape | Pixelate or solid blocks |
| Numbered steps | Type each number | Counts up with each click |
| Backdrop and shadow | No | Yes |
| Signatures, magnifier, PDFs | Yes | No |
Markup is already on your Mac and is enough for one arrow or a signature. Shotlighter is quicker when you're explaining something: a highlight, a few numbered steps and a blurred email address take a few seconds each.
Keep Shotlighter in your Dock
In Safari, open Shotlighter and choose File > Add to Dock. In Chrome or Edge, click the install icon in the address bar. It then opens in its own window like any other app, and works offline.
Tips
- Make the clipboard the default. Press ⌘⇧5, click Options, and under Save to choose Clipboard. See how to take a screenshot on Mac or Windows.
- Check the menu bar and notifications before you share. They often show your name, email or other apps you have open.
- Crop before you annotate when the screenshot is large, so your arrows and highlights stay in the frame.
More guides
- How to highlight text in a screenshotClean, straight highlights that snap to the text.
- How to blur or redact private info in a screenshotPixelate or black out names, emails, keys and card numbers.
- How to add arrows, boxes and text to a screenshotPoint at exactly what you mean.
- How to make step-by-step instructions with screenshotsNumbered markers that count up on their own.
- How to crop a screenshot and add a backdropTrim to what matters and make it look finished.
- How to edit a screenshot on WindowsSnipping Tool, and a quicker way to add labels, number steps and blur.
- How to take a screenshot on Mac or WindowsEvery shortcut, including copying straight to the clipboard.